
Yellow Lentil Soup

Lentils are edible pulse which i love the most. You can make from them almost whatever you want: oatmeal, soups, casseroles and even spread based on lentils. Today I will tell you how to cook a soup of yellow lentils without using a blender and extra fatty foods, so sit back and read the recipe below!
Before I start let’s make one thing clear about lentil. You can find several types of lentils on the market: red, black, yellow and green. Green and black lentils are good for soups but not suitable for creamy ones because they preserve their round shape during boiling process. For this recipe I would recommend to use red or yellow ones, as if they split after 30-40 minutes of cooking and you can literally mash it with a fork.
Serving size – 4 medium bowls.
List of ingredients:
Yellow lentils - 250 grams
Onions - 2
Garlic - 2 cloves
Olive oil - 4 tbsp
Cumin - 1 tsp
Lemon juice - from half a lemon
Parsley - a small bunch
Salt - to taste
Pepper - to taste
Toasted bread and vegetables - to serve
Method:
Finely chop the onions and place them in a cold pan with olive oil. Cook over medium heat, stirring constantly until the onions become brownish.
Once the onions are brownish, add finely chopped garlic and cook for 35-50 seconds, until you smell the garlic.
Once you felt the garlic, pour in 4-6 cups of water* and place your lentils into the pan. Bring to a boil, stirring occasionally. Reduce heat to medium and cook for another 30 minutes, stirring occasionally.
Lower the heat to medium low and continue cooking for another 45-50 minutes, until the lentils are split.
* I usually add approximate amount of water and don’t stick to the rule – 2 cups of water to 1 cup of lentils.
If the soup seems too heavy add one more glass of water and bring to a boil.
Remove your ready soup from heat, add cumin, lemon juice, salt, pepper and the finely chopped parsley.
Serve your soup with some vegetables and toasted bread.
Bon appetit!


Banana Pancakes
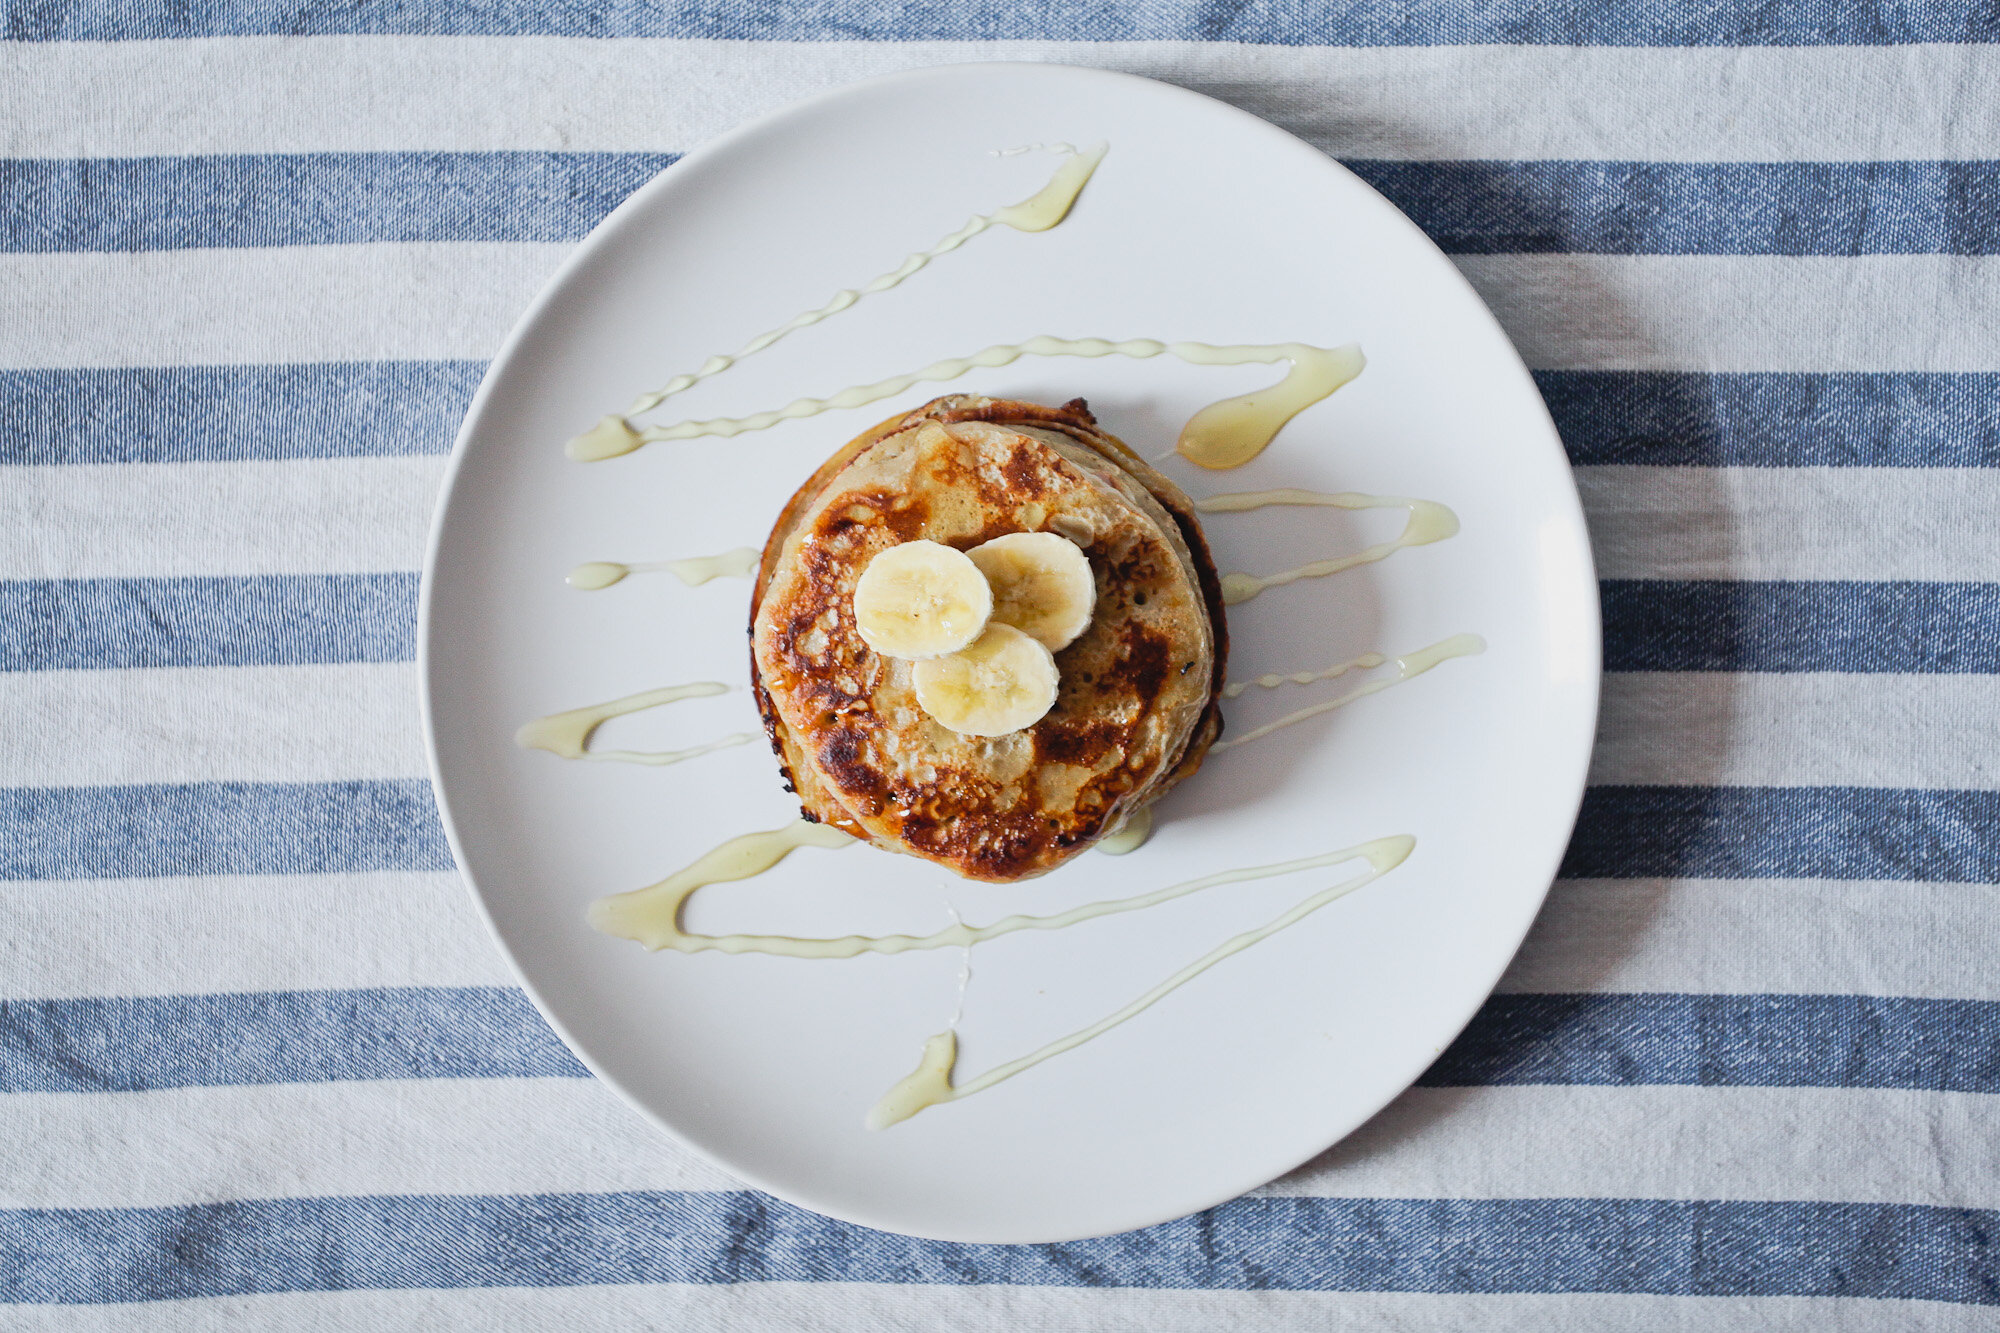
I started consuming a lot of bananas when I got a chance to review my diet. Turned out that lots of unhealthy stuff comes from the amount of white sugar I eat, so I started replacing it with fresh fruit. I know that sometimes a couple of large bananas contain more calories than chocolate, cookies or a scoop of ice cream. The only difference is that bananas are definitely healthier than all mentioned above because they contain natural sugars and protein. A benefit of natural sugars in bananas makes them a good replacement for cane sugar that you buy in a supermarket. That’s why I started treating myself with banana pancakes every Saturday and feel no guilt about that. So let me show my favorite recipe of banana pancakes to you.
If you decided to reduce the amount of sugar you consume – good for you! You can substitute it with honey or pureed sweet fruit. If you wish to make gluten free banana pancakes use almond flour and any other type of gluten-free flour that you will find on a market.
Serving size – 5-6 pancakes.
List of ingredients:
Flour - 130 grams
Salt - 2 pinches
Egg - 1
Whole milk - 150 ml
Banana - 1
Ground nutmeg - 0.5 tsp
Vanilla extract - 1 tsp
Honey or any other natural sweetener - 1 tbsp
Method:
Mix the flour, sweetener, salt, and ground nutmeg in a bowl.
Puree a banana and mix with milk, egg and vanilla extract. Give it a stir using a whisk.
Combine dry ingredients with wet. Mix well until the lumps disappear.
Heat sunflower oil in a pan over a medium heat. Fill a ladle on third and fry your pancakes for 1,5 minutes on each side under a lid.
To make your banana pancakes taste even better add some fresh bananas and honey to it.
Bon appetit!


Traditional Apple Crumble

It’s funny how the environment that surrounds you influence your diet. When I lived in Britain, I cooked many traditional European comfort food dishes after which I was obliged to run at least 5 miles before I come back and eat another portion.
In this recipe I’ll show you how to cook traditional British apple crumble.
What is the most important ingredient here? Hmm… I would like to say everything, but if I get to pick one, then perhaps I would choose apples. Apples you’ll choose for your sweet dish must exude a sweet fragrance and be no larger than a fist (well, maybe two fists, but certainly not more). And please choose organic ones.
Serving size – 4
List of Ingredients
Apples - 1 kg
Butter, cold - 200 grams
Cold water - 4 tbsp
Sugar for apples - 110 grams
Sugar for crumble - 60 grams
Plain flour - 280 grams
Cinnamon - 2 tsp
Oatmeal - 60 grams
Method
Remove the core. I use a corer for that so it makes the process easier.
If you don’t have a corer, do it in old-fashioned way or get one from your local utensil store. It’s incredibly helpful if you cook a lot with apples.
Peel the apples and cut them into medium chunks. Put your apples int the saucepan with 4 tablespoons of water and cook over medium heat for approx. 25 minutes stirring occasionally. If your apples start sticking to the pan add some more water.
When the apples become soft and brownish add 110 grams of sugar and 2 teaspoons of cinnamon. Give it a little stir, lower the heat and cook for 5 more minutes. Cool your apples before putting into a baking dish.
Make the crumble. In a separate bowl, crumble cold butter *, flour, oatmeal, and 60 grams of sugar together. It is better to do it by hands, because blender can accidentally turn your crumble into a purée.
* Cold butter is a must. Only in this condition it is possible to turn it into crumble. Otherwise, you’ll get an oily mixture that will smutch you to elbow and leave you in sorrow without tasty dessert.
When the crumble is ready put your apples into a baking dish.
Sprinkle your crumble mixture over apples evenly. Preheat the oven to 200 C (400 F) degrees and bake for about 45 minutes.
When the crumble crust becomes golden, your dessert is ready and you can start making some tea.
Serve hot with whipped cream, lemon jam, coffee or tea.
Bon Appetit!


Roasted Bosc Pears With Honey and Herbs

Christmas stuff has taken me by the storm. Relatives have started flying into the city one-by-one, presents need to be wrapped and dinner need a little rehearsal. Since I'm only here for a few minutes let's look at the ridiculously easy recipe of roasted pears that you may want to serve on the Christmas night!
I wasn't kidding when I say i few minutes. I literary have just a small pinch of thyme (ok, time) before I head out to the airport to meet another member of my family.
Serving size:
8 pieces (4 servings)
Ingredients:
4 Bosc pears
4 tbsp of coconut butter
8 pinches of lavender salt
Fresh thyme
4 dried bay leaves
4 tbsp of manuka honey
Ground pepper
Cream for serving
Nutritional value per serving:
250 Calories
10.6g Fat
44.3g Carbs
6.9g Fiber
2.1g Protein
The how-to:
Preheat oven to 200C/400F
Cut pears in half and take the seeds out. Suing grapefruit spoon make a medium hole in each pear.
Spread coconut butter, thyme, honey, lavender salt, ground pepper and bay leaves over the top.
Bake the pears for 40-60 minutes constantly checking.
Serve with whipped cream on the side.
Check out my instagram for Christmas stories and more awesome pics ;)

Lavender Shortbread

In between vanity and weekends, I usually get really hungry for sweets, but I just can't let myself buy packaged desserts. It just doesn't feel right to me. Plus you never know the full list of ingredients and the amount of sugar that the product contains. So obviously there is only one option: spend some amazing time baking lavender shortbread on this beautiful (wherever you are its always beautiful) day.
The recipe popped up in my head after I couldn't get myself to bed during the holidays. Not sure whether it was the amount of food that kept me awake or the amount of stress I had during planning family trips. Since I don't appreciate drugs and the sleeping pill I got left with pretty much one option: brew some chamomile tea and get my hands on baking with a pinch of calming lavender.
Serving Size
Approximately 15 shortbread
Ingredients:
Sugar - 40 grams
Butter - 50 grams
Flour - 75 grams
Lavender dry - 1.5 tbsp
White chocolate for melting - 100 grams (optional)
Nutritional info per serving (with white chocolate):
Calories - 88
Fat - 4.9 grams
Protein - 0.9 grams
Carbohydrates - 10.4 grams
How to make:
With a mixer, mix all the butter and all the sugar until soft and airy.
Mix the lavender with flour and add the dry mixture to the butter with sugar.
Sprinkle the surface with additional flour and knead the dough into a ball. Wrap in food film and put it into the refrigerator for a couple of hours.
Pull out the dough out of the fridge and roll it into a sausage 3-4 cm thick.
With a sharp knife, cut the dough into small 2 cm thick pieces.
Spread the pieces on oiled baking sheet.
Preheat oven to 160C/320F degrees and cook for 15-20 minutes.
While shortbread are baking, melt the white chocolate. Put the iron bowl over the pot with boiling water and wait until the chocolate is completely melted. You can also add 1 teaspoon of lavender to it.
Take the shortbread out of the oven and cool completely. Dip each piece into melted white chocolate.
The best addition to lavender shortbread is warm milk, cocoa or just tea with milk.
Have a nice tea!


Huevos Rancheros

Since moving to California in 2015 I instantly got into Mexican cuisine and got quite a number of friends with Mexican heritage but for some reason, I have not cooked any of their dishes until mid-2017.
Huevos Rancheros (or rancher's eggs) is a traditional midday or late morning dish in Mexico cooked in rural areas of Mexico. Recipes may vary to satisfy family's taste buds and preferences but one thing I can tell for sure: it always has fresh eggs, corn tortillas, and tomatoes.
Pro tip: the dish stays fresh for up to three days and feeds a family of two quite well. I made it for Sunday dinner and brought it to work twice to enjoy for lunch.
Serving size:
6 servings.
Ingredients:
4 x 6 inch tortillas
6 eggs
2 cups cooked rinsed pinto beans
1 onion- diced
2 garlic cloves- minced
2 tomatoes- diced
1 teaspoon cumin
1 teaspoon coriander
1/2 teaspoon chipotle powder
1/2 teaspoon smoked paprika
1/2 teaspoon kosher salt
cracked pepper
2 tablespoons water
Olive oil
1 large Avocado-sliced
2 tablespoons chopped fresh cilantro
1 lime -cut into wedges
1/2 cup crumbled cotija, queso fresco, feta or goat cheese (optional)
Hot Sauce
Nutritional value per serving:
368 Calories
14.7g Fat
36.7g Carbs
8.6g Fiber
15.1g Protein
Method:
Preheat oven to 400F/200C.
In a large pan, sauté onion in a little olive oil until tender, about 5 minutes (at this point, if you are adding other veggies, do this now, cooking until tender). Add garlic, sauté for a minute or two. Add 1/2 of the diced tomatoes (saving half for garnish) and cooked rinsed beans, spices, salt, and 2 tablespoons water. Let simmer on med-low for a few minutes, stirring occasionally.
Brush cast iron with olive oil, coating the edges too. Lay tortillas down and brush tops of tortillas with a little oil.
Divide bean mixture, making little indentations with the back of a spoon, for the eggs to rest, so they stay in place (if using a large skillet, layer the tortillas, so they come up the sides of the skillet a bit (you may need a couple extra), and spread all the beans evenly over the tortillas, making indentations for the eggs).
Carefully break the eggs and place them in the indentations. Sprinkle eggs with salt and pepper, and if you want, crumbled cheese, and place in the hot oven.
Check after 10-12 minutes. Cook until egg whites are white and yolks are to your desired doneness. Serve with avocado, lime, cilantro, hot sauce and fresh tomatoes.


Strawberry Salad

Last night a realized that I will only eat something that contains strawberries until the end of the summer (probably will for a week and then drop :D).
This salad popped in my mind out of random when I smelled fresh strawberries at the farmers market. There was no better meal that day!
Serving size:
4 servings
Ingredients:
1 large box of strawberries
10 small mozzarella balls
4 cups of arugula
Half or red onion
0.5 tsp of dijon mustard
2 tbsp of olive oil
7 fresh strawberries for dressing
0.5 tbsp of balsamic vinegar
Salt
Pepper
5 sprigs of mint
Nutritional value per serving:
148 Calories
7.9g Fat
15.1g Carbs
2.8g Fiber
3.1g Protein
Method:
Cut strawberries into halves setting aside 7 of them to make the dressing.
Thinly slice red onion and cut mozzarella balls in halves.
Pick mint leaves and finely chop them.
In a blender puree strawberries, mustard, olive oil, balsamic vinegar and some salt.
Mix mozzarella, strawberries, arugula, mint, salt, pepper and red onion in a large bowl.
Dress to taste and serve!

Full Guide To The Perfect Steak

If you are reading this article, you have probably seen my Instagram page (which is totally awesome btw), or you stumbled upon the link looking for a perfect steak recipe but almost lost hope. Well, I’m here to help!
Trust me, after you open this article your life will change for good:)
First, let’s consider common mistakes that humans make while trying to prepare a piece of meat:
1. They Cut the steak before cooking
If you want your steak cut before cooking it’s not gonna work and instead of a lovely and beautiful looking medium rare, you will get a well-done dry piece. If you do this, you might as well consider mincing it because you already destroyed the perfect creation of mother earth. Oh well… Just never cut your steak before cooking, mkay?
2. They cut their steak with the grain
Don’t blame the meat, blame the chef they say! It is a widespread mistake, and you should pay your full attention to the grain (the lines going in the specific direction on the piece of meat). If you cut with the grain (or lines), it will be tough to chew on since you will basically try to cut through the muscles with your teeth. If you cut against the grain (or against those lines) half of the chewing job is done for you.
3. They cut the steak way too early
Imagine a pot of boiling water. What happens to it for a few seconds after you take it off the heat? Right, the water keeps simmering for few more seconds. The same thing happens inside of the steak when you take it off the pan. All the juices are moving around and still cooking the steak from the inside. Let it sit for 3-4 minutes at the room temperature before cutting it.
If you cut it too early you dinner may accidentally turn into a crime scene.
4. They flatter the meat with a mallet
Why would you ever do that to your steak you filthy animal?! I have seen people doing it, and it is as painful as it sounds. Do not ever do that because you want a beautiful solid piece of meat ideally medium or medium rare. It’s not going to get softer and will ruin the whole idea of the steak as a dish.
If you flatter meat or poultry with a mallet, you might as well use it as a secondary ingredient for some other dish.
5. They overcook the steak
Also a widespread mistake. For some people, even a little pinkish color indicates that the product as raw and shouldn’t be consumed. With the beef, it is tricky because you either cook it fast or slow. You can make your steak well done but make sure that you have a reliable thermometer and this table below:
Rare – 52C/125F
Medium Rare – 57C/135F
Medium – 63C/145F
Medium Well – 66C/150F
Well Done – 71C/160F
Now, let’s move on to the recipe:
Red Wine Reduction Sauce ingredients:
750 ml of good merlot or cabernet sauvignon
2 cups of Portuguese port wine
1 cup chicken broth
1 stalk of celery
1 carrot
1 clove of garlic
1 onion
1 pinch of cloves
1 apple
3 tablespoons olive oil.
How to Make:
Very finely chop the carrot, apple, garlic, onion, and celery and fry in a deep sauté until a little brown.
Pour the wine, port, reduce the heat to low and cook, stirring for about 1.5 – 2 hours without a lid.
Strain the wine liquid, pour into a clean saucepan, add olive oil, broth, cloves and cook on low heat for another 30-35 minutes or until the sauce thickens or reduced by 1/2 cup.
In total, you should get about 100ml of the sauce, not more.
Ingredients for the steak:
1-2 pieces of fresh steaks
3 tablespoons butter
Rosemary or thyme optional
Sea Salt
How to cook:
Preheat the oven to 200С/400F.
Melt the butter in the pan and add the herbs of your choice.
Put the meat in a frying pan and continuously start pouring the butter over the steak with a spoon. Sear the steak on both sides for 2 minutes each.
Place the parchment paper on the baking sheet, and put the steak on top. Cook until the desired temp for about 7-10 minutes
Check the temperature with a thermometer.
Let the steak sit at room temperature for 3-4 minutes and cut against the grain/lines.
Serve the steak with wine sauce, sea salt potatoes or green salad.
Bon Appetit!


Irish Stew With Guinness

Saint Patrick’s day was fun and roaring last weekend. I made this awesome stew but since fun and company took me far away from my computer I’m only posting the recipe now.
The recipe is amazing and has Guinness in it
Serving size:
4 servings
Ingredients:
500g stew beef
1/4 cup of flour
1/4 cup of vegetable oil
1 onion
2 cloves of garlic
1 can of Guinness
4 cups of beef broth
2 bay leaves
2 teaspoons of thyme
3 medium carrots
500 g of potatoes
100 g of English peas
Parsley
Salt
Pepper
Nutritional value per serving:
600 Calories
29g Fat
37.8g Carbs
4.4g Fiber
42g Protein
Method:
Soak your beef stew the night before. In a deep bowl combine beef, salt, and Guinness. Cover and place in a fridge overnight.
The next day start making your stew.
Fry your beef inside of a large pot with a little bit of oil over high heat just until it is browned. I suggest cooking it in batches so every piece has a little char in it. Set Guinness aside because we will need it for later.
Add oil to a deep pot, chop your onions and cook over medium heat until soft.
Add chopped garlic and cook for another 30 seconds.
Add flour and mix well.
Add Guinness and cook for 3 seconds.
Add cut carrots, potatoes, peas, bay leaves, thyme, beef, and broth.
Bring to a boil, reduce heat and cook for 1 hour or until beef is completely tender.
Serve with parsley and enjoy!


Baked Turkey Meatballs With Tomato Sauce

I always like to make a variety of dishes for dinner, It is usually something new and pretty complicated, but there are some days when I don’t have a power or time for anything. In this case, I always keep at least 5-6 recipes in my head, which will undoubtedly turn out delicious and will not take me half a day.
My relationship with meatballs has developed from the very first time, and regardless of mood, circumstances or weather, I make them good.
I try to use different types of proteins in my recipes, but the most delicious once turn out with turkey, so today I will tell you in detail about my most foolproof and tasty method.
Pro Tip:
Some recipes for meatballs call for breadcrumbs, but I use fresh bread without crust. I just grind it in a blender.
Ideally, there should be very little bread, just enough for ground turkey to come together.
Serving size:
About 12 medium meatballs
Ingredients:
550 grams of ground turkey
1 egg
30 grams of bread crushed in a blender
3 tablespoons Parmesan cheese
0.5 tbsp. dried oregano
Half onion
2 cloves of garlic
300 ml of tomatoes in its own juice (preferably San Marzano)
50 ml Chardonnay
Salt
Pepper
Chives for serving
Nutrition Per Serving (per meatball):
120 Calories
6,6 g Fat
4.1 g Carbs
0.5 g Fiber
0.7 g Sugar
10.6 g Protein
How to make:
Preheat the oven to 200C/400F degrees.
In a large bowl combine the ground turkey, parmesan, bread, oregano, egg, 1 chopped clove of garlic, salt and pepper to taste.
Mix well and start rolling balls about 3-4 cm in diameter.
Lay the meatballs on the baking sheet and bake for 15-20 minutes or until golden brown.
Make the sauce. In a frying pan fry the finely chopped onion until soft. Add chopped garlic and cook for another 30 seconds.
Reduce heat to medium, add wine and cook stirring, 2-5 minutes or until the wine is reduced by half.
Add the tomatoes, cook for 5-7 minutes, add salt and set aside.
When the meatballs are ready, mix them with the sauce and serve with freshly chopped chives.
Bon appetit!


Blood Orange Roasted Chicken

Blood Oranges are typically a very winter fruit but it always reminds me of upcoming spring (mainly because of its color). That is why I usually cook dishes with them on first days of March.
I found the similar recipe on Williams Sonoma website but realized that it lacks something and added green olives. It is super simple and blood oranges make the chicken pop in flavor!
Quick hint: if you add a piece of roasted blood orange on your chicken, it will be the most heavenly dish you’ll eat that day! I promise!
Serving size:
1 chicken for 6 people
Ingredients:
1 kg – 1.5 kg (3.5 lbs max) of young chicken
5 blood oranges
3 cloves of garlic
1/2 cup marsala wine or good port wine
1 medium red onion
Thyme
Blood Orange zest
1 cup of green olives
Olive oil
Salt
Pepper
Nutritional value per serving:
690 Calories
43.4g Fat
18.7g Carbs
3g Fiber
46g Protein
Method:
Preheat oven to 450F/220C.
Remove the chicken from the fridge and let it sit at room temperature for about half an hour.
In a large baking form mix wine or a port with juice from two blood oranges.
In a separate bowl, combine the zest of three blood oranges, salt, and pepper.
Smear some olive oil over the chicken, followed by a mixture of salt and zest.
Cut one blood orange into quarters and put them into the cavity along with one garlic clove and a few sprigs of thyme.
Tie the legs and wings and put the chicken into a baking dish with wine and orange juice breast up.
Cut the remaining oranges into circles and lay them around the chicken.
Cut the red onions into small pieces, spread over the oranges and place two crushed cloves of garlic.
Roast the chicken for 20 minutes.
Reduce the temperature to375F/ 200C and continue cooking for 30-45 minutes.
Check the temperature of the bird. If an instant thermometer shows below 170F/75C. Roast your chicken for 10 minutes longer.
If you notice that the chicken starts to burn, cover the baking sheet with foil and continue cooking.
Approximately 10 minutes before the chicken is ready, add the olives.
Pull the chicken out of the oven and let it sit at room temperature for another 20-30 minutes, so that all the juices inside do not flow out while you cut into it.
Bon appetite!

Weeknight Chicken Cacciatore

Weeknight dinners are always a challenge for me since I almost never buy frozen foods, canned products, and even pre-made sauces. But last night I have sinned… As I was walking out of a supermarket I grabbed a can of Rao’s marinara sauce on the go.
I didn’t know whether I did the right thing until after my chicken cacciatore came out of the oven. It turns out that some brands still care about the quality and flavor and I’m happy I made it.
Chicken cacciatore is an Italian dish made the “hunter style” way. It’s basically a stew with tomatoes, basil, onions, garlic and peppers thrown together and stewed for an hour or so. It can also be baked or prepared with lamb or beef.
Pro tip:
To prevent the sauce from getting all over your oven, cover the dish with foil for the first 10 minutes in the oven.
Serving size:
4 servings
Ingredients:
2 chicken breasts
1 jar of Rao’s marinara sauce
3 tbsp of toasted pistachios
A quarter of a sweet onion
2 tbsp of olive oil
100 g of Green olives
Thyme
Salt
Pepper
Nutritional value per serving:
515 Calories
24g Fat
15.3g Carbs
3g Fiber
56.2g Protein
How to make:
Preheat oven to 375F/200C
Cut chicken breast in half and sprinkle with salt and pepper.
Heat olive oil in a pan over high heat and quickly fry chicken on both sides for 1-2 minutes and set aside.
Pour marinara sauce into a baking dish, cut olives in halves and add them to the sauce.
Put chicken breast on top, gently pour some sauce over it and put a few sprigs of thyme on top.
Bake the dish for 25-30 minutes.
Take the dish out and turn the broiler on.
Cut sweet onion into the strips, mix with a splash of olive oil and broil for 5-6 minutes until slightly darkened.
Add sweet onions to the dish and serve.
Bon Appetit!

Chicken Legs In Sage Pomegranate Sauce

Why turkey?
Why not fish, duck, chicken or any other bird?
According to a news article: Turkey was indigenous to North America and a way to feed lots of people as well.
Another source claims that it has to do with Charles Dickens and A Christmas Carol. When the book was published in the 1840s, it introduced an American audience to the idea of a turkey being something special.
Another article says that It was during Abraham Lincoln’s presidency. After his election, he had started the tradition with a Thanksgiving dinner that featured roast turkey, reportedly his favorite meal.
Even though there are myths going around the turkey being on our table, one thing we know for sure – it doesn’t have to be a turkey.
That’s why today we are going to make chicken legs in rich sage and pomegranate sauce!
Pro Tip: To make the sauce I use pan drippings and emulsify it into a nice and thick sauce in a pan. No flour or starch needed!
Serving size:
About 5 (2 legs per serving)
Ingredients:
10 chicken legs
6 cloves of garlic
6 sprigs of sage
1 cup pomegranate juice
1 cup chicken bone stock
Seeds from half pomegranate
Olive oil
Salt
Pepper
Nutrition:
572 Calories
30.9g Fat
9.4g Carbs
0.6g Fiber
60.4g Protein
Method:
Preheat oven to 400F/200C
Put salt and pepper on chicken legs and leave at room temp for 30-60 minutes.
Combine stock, pomegranate juice, sage, smashed garlic, pomegranate seeds in a deep baking dish.
Put chicken legs into the dish, pour some olive oil on top, cover tightly with foil and cook for 25 minutes.
Turn the legs over to the other side and cook for another 10-15 minutes.
Set chicken legs aside.
Put pan drippings into a saucepan and cook over medium heat until thick for about 5-7 minutes.
Pour sauce over chicken legs and serve!
Enjoy!


Homemade Syrniki (Ricotta Pies)

As a proud Russian, I sometimes miss my grandma’s comfort food. Syrniki, which entire female population of my family used to make, was my favorite breakfast before school.
My mom usually served it with sour cream, my grandma made it with strawberry preserves and my other grandma made it with apricot jelly. Everyone had the way to make and eat them. Today I would like to introduce you to something that warms my heart and brings warm memories to my head bite by bite.
Syrniki is the dish that is typically made from Russian cottage cheese named “tvorog”. The consistency of this tvorog is very dry and reminds of cottage cheese that you can find in any local supermarket but the difference is – the taste. Tvorog is typically a little sour, smells like raw milk and considered as superfood where I came from. I couldn’t make or find anything like this in the US, so I substituted it with cottage cheese first but the batch I made was liquid and too salty to my breakfast taste. After searching the supermarket shelves a little longer I decided to go with ricotta and made a few different batches before the quality of the product satisfied my pallet.
Serving size:
8 pieces
Ingredients:
450 g of whole milk ricotta
1 egg
65 g all purpose flour
3 tablespoons of honey
Nutritional Info per 1 piece:
144 calories
6.3g Fat
42.3 g Cholesterol
14.6 Carbs
8.6 Protein
How to make:
Preheat oven to 400F/200C.
Combine ricotta, honey, and 1 egg and mix well.
Start adding flour by slowly stirring the mixture.
Put a piece of parchment paper over baking sheet.
Using two tablespoons or an ice cream scoop start scooping the mixture onto the tray.
Bake for 15-20 minutes or until syrniki become solid.
Serve hot with a little extra honey or preserves over the top.
Bon Appetit!


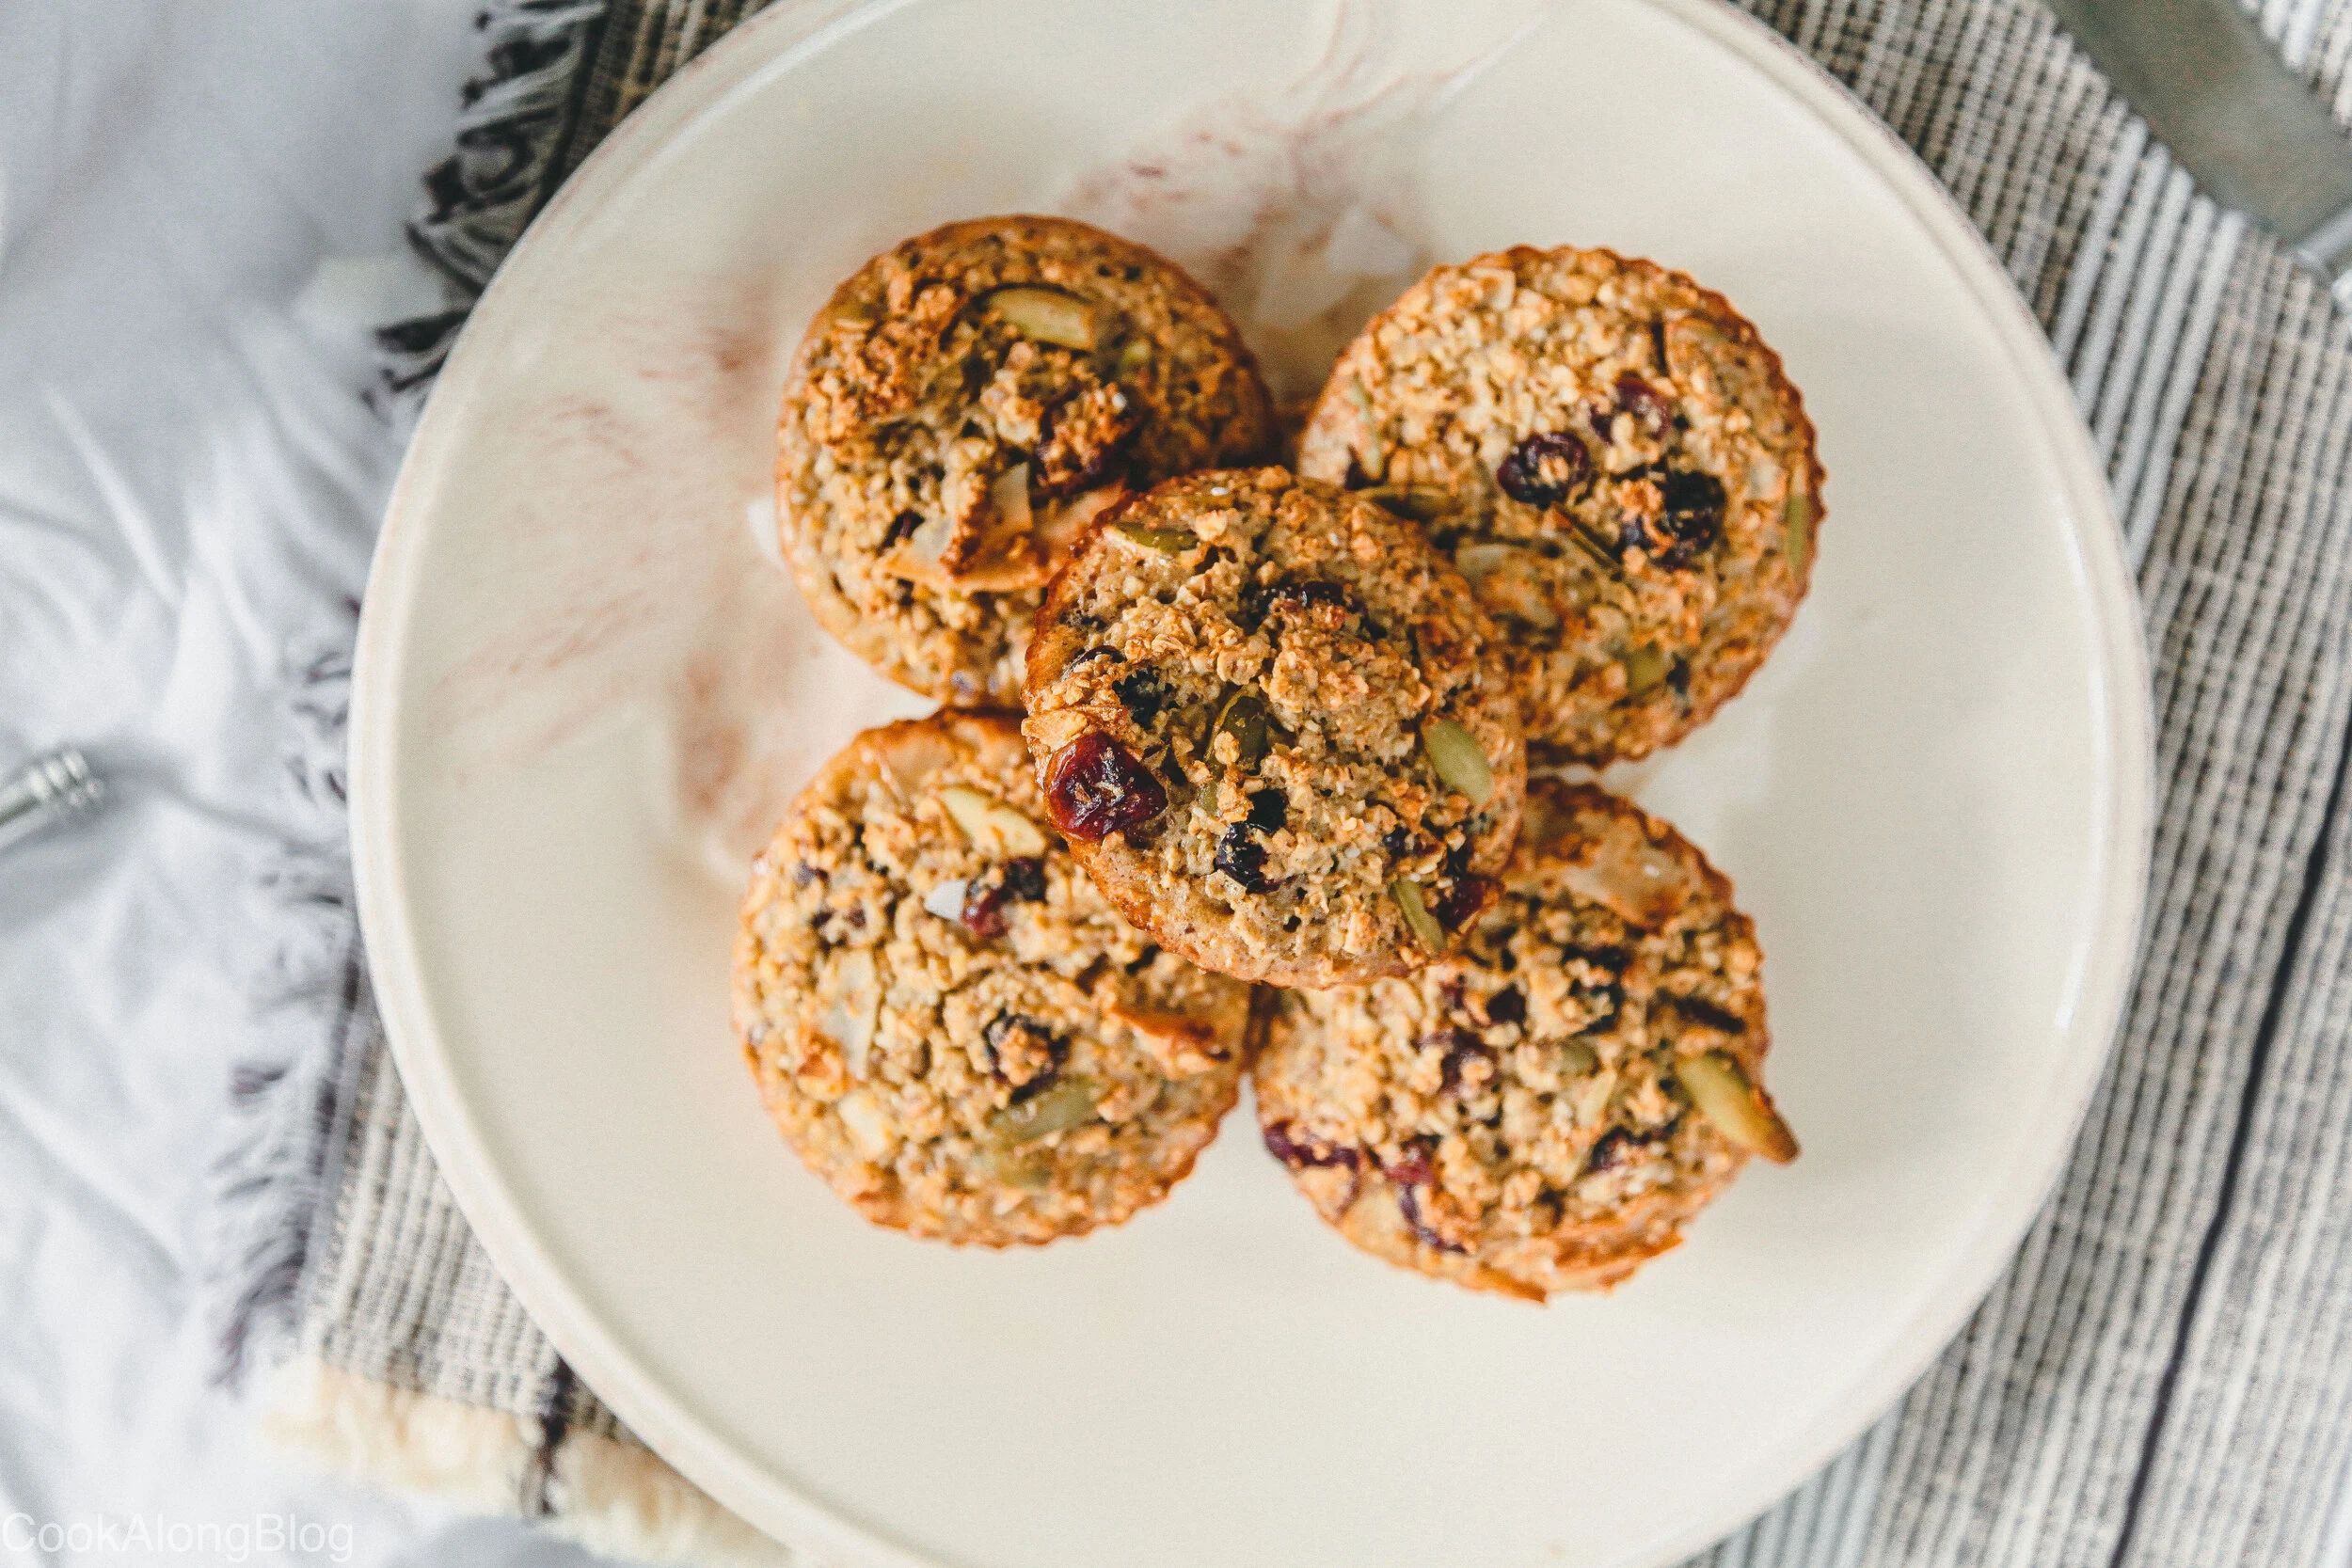
Oatmeal Breakfast Cups

I woke up to heavy rain and gusty winds on Wednesday. This kind of weather always reminds me of London where all that I ate for breakfast were: oatmeal and tea with milk. I remembered how good I exercised afterward and how full I stayed during the day.
Since I always have some nuts and dried berries in my drawer, the choice of breakfast dish was clear!
I only try to make a small batch if I bake something for breakfast, but oatmeal cups were an exclusion. They stayed fresh for two days and all I needed was to reheat them a little in a microwave.
Serving size:
5 cups
Nutritional info:
Fat – 4.2 g
Protein – 4 g
Carbs – 16.3 g
Fiber – 2.4 g
Calories – 118 per each
Ingredients:
80 g rolled oats
36 g dried cranberries
1/2 cup almond milk
1 egg
10 g coconut flakes
10g pumpkin seeds
1 tsp. of baking powder
20 g blue agave extract or honey
1 tsp of vanilla extract
Salt
Method:
Preheat oven to 350F/180C.
Combine Almond milk with 1 egg, vanilla extract, and agave or honey and beat until combined.
In a separate bowl combine oats, salt, cranberries. baking powder, seeds, and coconut flakes.
Mix wet ingredients into dry. The mixture will be wet and it is absolutely fine.
Using a tablespoon or an ice cream scoop divide the mixture between cupcake forms and bake for 25 minutes.
Let them cool at room temperature for 5 minutes before serving.
Enjoy!

Blackberry Thyme and Meyer Lemon Galette

When I explain galettes to the people, I always say “It’s like a giant cookie but with fillings and a lot tastier.” Even French Canadians call it that way, filling their galettes with sweet ingredients.
However, term “galette” comes from the region of Brittany in France and typically made with savory ingredients using buckwheat flour. I got inspired by both ways and did a lot of research before putting my first galette together. I relied on seasonal berries, slightly unusual bitter Meyer lemons and my favorite thyme.
This recipe came out rich, delicious and needed just a splash or rosé to finish up what I started.
I would suggest serving it with regular vanilla ice cream or whipped cream but if you are feeling creative, let your taste buds lead you to the flavor country.
Don’t forget a glass of chilled rosé, it pairs wonderfully with it!
The dough can be made 2 days ahead
The whole thing can be made a day ahead but it is better served warm.
Serving size:
4 servings
Ingredients:
1 cup of all-purpose flour + more for dusting
1/3 cup of buckwheat flour
1/4 cup of ice cold water
6 tbsp of brown sugar
1 tsp of salt
1/2 cup of butter
1 lb of blackberries
3 sprigs of thyme
1/3 of Meyer lemon
1 tbsp of cornstarch
1 egg for eggwash
Whipped cream or ice cream
Nutritional value per serving:
507 Calories
25.4 g Fat
65g Carbs
8.2g Fiber
8g Protein
Method:
Make the dough. Mix together all-purpose flour, 3 tbsp of sugar, salt, buckwheat flour in a large bowl.
Add chilled butter and rub it in between your fingers until pea-sized clumps remain (I suggest doing it without a blender since it may potentially warm up the butter and make the whole thing gooey).
Sprinkle 1/4 of ice cold water over the dough and turn it into a ball (if it feels too sticky you can use extra flour).
Shape the dough into a sausage and divide it into 4 parts. Stack parts onto each other and roll it out into a circle.
Wrap it in plastic and chill for 1-2 hours or overnight.
Preheat your oven to 400F/200C.
Cut blackberries in halves and Meyer lemons into 1 inch thick pieces.
Combine blackberries, lemons, and thyme in the bowl with cornstarch and 2 tbsp of brown sugar. Let it sit for a few minutes.
Take the dough out and put it on top of the parchment sprinkled with flour. Make sure the dough has an even circle shape. You can use a large bowl to shape it.
Put the filling in the center of the dough and start wrapping the surrounding edges.
Egg wash the edges and sprinkle remaining 2 tbsp of brown sugar over the top.
Bake for 25-35 minutes until golden brown.
Serve with ice cream or whipped cream warm or cold.
Bon Appetit!
The recipe is adapted from Bon Appetit magazine publication.


Cobbler With Port Macerated Figs

As your beloved neighbor and experienced chef, I would love to offer you a piece of my favorite pie so you feel a little better about the whole situation.
Spoiler alert! You will have to cook it yourself!
Cobbler is my favorite thing to make during fall. I don’t bake a lot, but this one I make almost every week of Sep, Oct, and Nov.
Pro tip: Leave cut figs in port for a little longer (like overnight) for a richer flavor. Use a good port that you would drink yourself. Please, don’t use cheap alcohol ever in cooking.
Serving size:
4 servings
Ingredients:
15 Ripe Figs
60 ml of good port wine
125g of all purpose flour
2 tsp of baking powder
80g of brown sugar
60g of vegan butter (yeah, the recipe is vegan btw!)
120 ml of pea milk
5 sprigs of thyme
A pinch of salt
Cooking spray
Nutritional value per serving:
438 Calories
11.2g Fat
77.2g Carbs
6.5g Fiber
6.6g Protein
Method:
Mix figs with thyme port and leave for 2-3 hours at room temperature or refrigerate overnight.
Heat oven to 350F/180C
Mix flour with sugar, baking powder and salt.
Melt vegan butter and mix it with pea milk.
Combine dry ingredients with wet until the smooth substance is formed.
Spray a baking dish with cooking spray and put figs with a little port and thyme at the bottom.
Put batter over the top and bake for 35-45 minutes or until the top is slightly browned.
Consume right away with a scoop of ice cream.

Great Depression Cooking: Cheese Souffle

Great Depression struck the United States on October 29th, 1929.
It was a huge segment of history that changed the lives of millions of people who stood in lines in the cold to get supplies to feed their families. Former rich, poor, middle-class families, everyone was there equal as hunger stroke the country.
Even though it was a hard time, homemakers and housewives did everything they could to cook the meals and make them delicious. This only proves one simple thing: no matter how hard the times were, people still loved to eat good and tasty food.
I would like to honor those brave ones who stood strong and kept going, spent hours in lines to get fresh goods and cook meals. I will dedicate this month to the great depression recipes that I have found in books, archives, and old recipe booklets.
I may slightly change the recipes but using the same old products that people used during the 1930’s.
Let’s start with cheese souffle.
Pro tip: serve it as soon as you can because the souffle falls down quickly. Also, it is at its best when served warm. Eat with soup, cheese spread or butter.
Serving size:
12 portions
Ingredients:
3 tbsp of flour
3 tbsp of butter
3 eggs
1 cup of milk
1 cup of cheese (I used Mexican blend)
Salt
Pepper
Chives for serving
Pumpkin puree mixed with cream, cheese, and salt for serving
Nutrition:
88 Calories
6.4g Fat
3.1 g Carbs
4.1g Protein
No Fiber
Method:
Preheat oven to 350F/180C.
Stir butter and flour together in a saucepan until the butter is melted.
Add milk a little at a time and stir until the mixture comes together.
Add salt, pepper, cheese, mix together and set aside to cool.
Separate egg yolks from the whites.
Beat the yolks and add them to cool cheese mixture.
Beat the whites to stiff peaks and gently fold them into the cheese mixture.
Grease baking forms, divide the mixture between each one and bake for 20-25 minutes.
Plating:
Mix pumpkin puree with cheese, a little cream, salt, and chives.
Put cheese souffle on top and sprinkle with more chives.


Great Depression Cooking: Banana Bread

In 1931 a book called “Aunt Sammy’s Radio Recipes” came out and was available nationwide in the bookshops.
Aunt Samy was a fictional character and had her own cooking show called Housekeeper’s Chat. Its target audience was farm wives. She was introduced by the US Dept of Agriculture, Bureau of Home Economics during the Great Depression. Supposedly the wife of Uncle Sam, the character was voiced by different women at each individual radio station, using a standardized script.
The show was broadcast until 1944.
Banana bread recipe supposedly emerged during the great depression since the housewives were unwilling to throw away overripe bananas.
During my trip to Hawaii, I noticed that banana bread is very popular among Maui population and in my opinion it’s because the island has a lot of hiking options and banana bread is great for sustainable energy for such a long activity.
Pro tip: let the bananas sit at the counter at a room temperature for 3-4 days before using. “Just enough” ripened bananas is not enough. They need to be darkish for this recipe.
Serving size:
6 small servings
Ingredients:
1/2 cup of butter
1/2 cup of sugar
2 eggs beaten
3 bananas (overripe!)
1 tsp of baking soda
1.5 cups of flour
A little salt
1 tsp of ground cinnamon
Nutrition:
392 Calories
17.4g Fat
54.6g Carbs
2.6g Fiber
6.1g Protein
Method:
Preheat oven to 350F/180C.
Cream melted butter and sugar and then add beaten eggs.
Mash bananas and add to the egg mixture. Mix well.
Mix flour, salt, and cinnamon.
Start adding dry ingredients to wet bit by bit.
Grease the baking dish and transfer banana mixture into it.
Bake for 45-55 minutes or until a toothpick inserted into the center on the bread comes out clean.
Serve warm or cold with a side of pumpkin spread and any jelly.


Candied Citrus Peel

In Russia, we usually add candied citrus peel to our Easter cakes. I was not a big fan of them up until I actually made them from scratch. I kept snacking on them once I started making my own Easter cake, and they turned out very delicious!
Candied citrus peel will be an amazing addition to your baked goods, tea, Christmas table, and desserts. It is also very cheap to make!
Pro Tip: I always keep some citrus peel in my freezer in case I feel like making it.
Serving size:
1 medium Easter cake (about 150 grams of citrus peel)
Ingredients:
Peel from any 6 citruses (medium size)
2 cups of sugar
Salt
Lemon juice (about 4 tbsp)
Water
Nutrition (per 50 grams):
398 calories
0g Fat
104g Carbs
0.8g Fiber
0.1g Protein’
Method:
Clean the citrus and place the peel in a saucepan with water. Wait until it boils, reduce the heat and simmer for 10 minutes.
Repeat the process one more time, but with a couple of pinches of salt.
Rinse the crusts and cut into strips or cubes (just how you like it).
Combine the sugar with 1 cup of water, boil and put the peel in there. Reduce the heat to medium and simmer for 20-25 minutes until it is almost completely reduced (BUT NOT CARAMIZE!). Ideally, it should be liquid y and transparent. Add lemon juice at the end.
Put candied citrus peel on the parchment and sprinkle with sugar.
Optionally you can dry it in the oven for 5-7 min at 200C/400F
Store in a cool dry place.
